Quindim
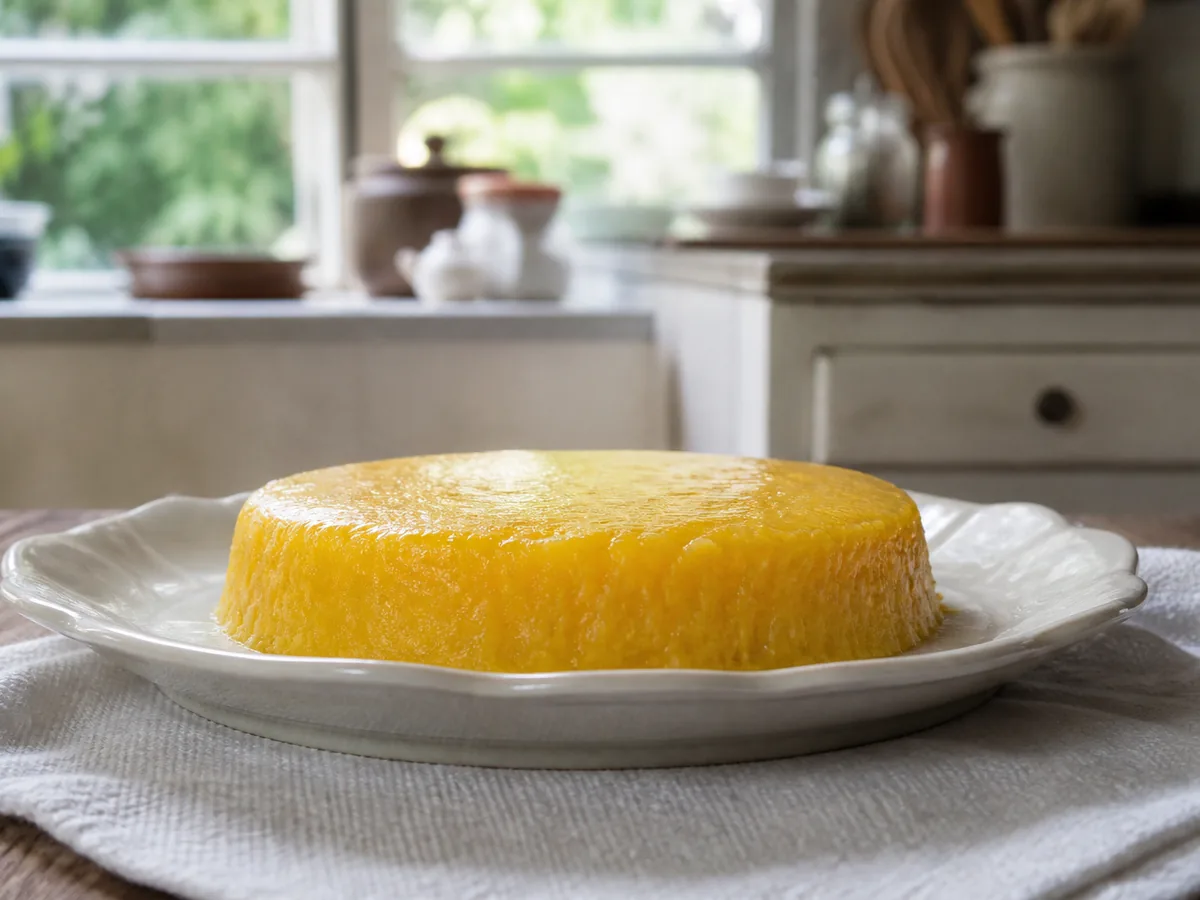
Twenty yolks, sugar and coconut baked in a water bath until the top sets into a lacquered dome, then unmolded so the shine becomes the face. Not flan, and not a cake.
- Prep
- 35 min
- Cook
- 55 min
- Serves
- 12 muffin-size quindins, or one 20 cm quindão
- Difficulty
- Hard
Researched · Kitchen testing pending
Sugar meets yolks in a bowl and the mixture turns the colour of deep marigold before the coconut even goes in. That is the visual I chase every time I bake quindim.
This is Brazil’s coconut-egg-sugar custard, baked in molds until the top sets into a shiny lacquered dome, then unmolded so that glossy face becomes the presentation side. It is yolk-heavy on purpose.
I bake it in a water bath when I want insurance against curdling, and I watch the oven temperature like a hawk, because yolks scramble the moment the heat spikes.
A good quindim should catch the kitchen light on its unmolded face like polished stone, smell of coconut and cooked sugar, and cut into a moist dense crumb that is clearly custard. Bake it once with the bath and the sieve, and the second batch feels like muscle memory: syrup, yolks, coconut, gloss, flip.
The custard
- 360–380 g20 largeEgg yolksweigh them if you can — "20 large" varies more than you would like. Save the whites
- 400 g2 cupsGranulated sugar
- 100 ml7 tbspWater, for a light syrupsome bakers cream the sugar into the yolks dry; the syrup gives a silkier texture
- 150 g5.3 ozUnsweetened desiccated coconut, finely gratednot sweetened flake candy coconut if you can avoid it
- 30 g2 tbspUnsalted butter, melted and slightly cooled
- 5 ml1 tspVanilla extractoptional — traditional bakers often omit it
- ⅛ tsp⅛ tspFine saltit sharpens the sweetness rather than making it salty
For the molds
- as neededas neededSoft unsalted butter, for generous greasing
- 30–40 g2–3 tbspSugar, for dusting the moldsit helps release and builds a thin caramelized skin
For the bath
- 1–2 L4–8 cupsHot water, just off the boilabout 90–95 °C — not boiling violently when you pour
Why so many yolks
Quindim's identity is yolk richness against coconut and sugar. Cutting the yolks back changes the structure toward sponge in one direction or watery custard in the other. Do not lighten this into a whole-egg pudding and expect the same shine.
What it is not
Not flan. There is no milk-custard set with a separate poured caramel layer doing the structural work, and the coconut gives a dense, almost candy-adjacent crumb rather than a trembling dairy gel. Not brigadeiro. No condensed milk, no chocolate, no rolling in sprinkles. If your batter looks like cake batter with flour in it, you have left quindim territory.
Sugar is structure here
It is not only sweetness — it carries the set and the shine. You can try 350 g once you know the dish, but big cuts give fragile, dull results.
On fresh coconut
Traditionalists sometimes use heavily drained fresh grated coconut. If you do, squeeze it thoroughly and cut back the added water. This recipe uses desiccated because the moisture is predictable, and predictable moisture is what lets a beginner learn the set.
Equipment
- A 12-cup muffin tin, individual fluted molds, or one tube/ring mold for a quindão
- A small saucepan for the syrup
- A whisk and a rubber spatula
- A fine-mesh sieve — genuinely important
- A roasting pan big enough to hold the tin for the bain-marie
- A thin knife or offset spatula for unmolding
An instant-read thermometer is optional but useful twice: on the syrup, and on the custard centre where the line between set and scrambled is narrow.
Method
Separate the yolks carefully10 min
Crack the eggs cold and separate them. A little stray white is fine; a lot of white makes the bake puffier and less dense.
Weigh if you can — you want roughly 360–380 g of yolks. Into a wide bowl.
Separate cold eggs carefully, keeping excess white out so the custard remains dense. Weigh roughly 360–380 g yolks into a wide bowl; save the whites for another use.
A brief syrup, stopped before colour5 min
Sugar and the 100 ml of water in a small saucepan over medium heat. Stir only until the sugar dissolves and the liquid runs clear, 3 to 5 minutes.
You are not making caramel. Stop before any colour — about 104–106 °C / 220–223 °F if you are measuring. A thin syrup, no thread stage drama.
It should smell purely sweet, look pale and glossy, and coat a spoon lightly. Let it cool 2 to 3 minutes, or it will scramble the yolks on contact.
Heat sugar with 100 ml water over medium, stirring only until dissolved and clear, 3–5 minutes. Stop before colouring, about 104–106 °C / 220–223 °F; cool 2–3 minutes before adding to yolks.
Temper, then combine5 min
Pour the warm syrup into the yolks in a thin stream, whisking constantly. The mixture thickens slightly and turns that intense yellow-orange.
Whisk in the melted butter, the salt, and the vanilla if you are using it.
Then the coconut, folded through with a spatula until every shred is coated and suspended, with no dry pockets.
Pour warm syrup into yolks in a thin stream while whisking constantly. Whisk in melted, slightly cooled butter, salt and optional vanilla; fold in finely grated desiccated coconut until evenly coated, with no dry pockets.
Sieve — the step people skip5 min
Press the mixture through a fine-mesh sieve into a clean bowl, pushing as much coconut through as you can. You will not get every strand through, and that is fine — scrape back what stays behind if it is mostly coconut.
Why bother: straining catches chalazae, bits of membrane, and undissolved sugar crystals. Those are what put bumps in an otherwise mirror-flat face.
Press the mixture through a fine sieve into a clean bowl to remove membranes, chalazae and sugar crystals. Push through as much coconut as possible; return retained material only if it is mostly coconut.
Rest the batter10–15 min
At room temperature. The coconut hydrates, the bubbles calm, and the mixture thickens a touch.
It should smell eggy-sweet with coconut behind it, look like a loose cake batter, and feel grainy from the coconut if you rub a drop between your fingers.
Rest the batter at room temperature for 10–15 minutes so the coconut hydrates and bubbles settle. It should thicken slightly while remaining loose, with coconut suspended throughout.
Grease the molds like you mean it5 min
Butter every mold generously — corners and flutes especially. Dust with sugar and tap out the excess.
That double coat is both your release agent and a micro-crust. Under-greasing is the number one cause of torn tops at the unmold.
Rack in the centre of the oven, preheated to 180 °C / 350 °F.
Generously butter every mould, especially corners and flutes; dust with sugar and tap out excess. Position the oven rack in the centre and preheat to 180 °C / 350 °F.
Fill, and set the bath5 min
Stir the rested batter once and fill each mold about three-quarters full. Quindim rises only modestly, and overfilling spills into the bath and gives ugly edges. For a ring mold, pour it all in and smooth the top.
Set the tin inside the roasting pan, then pour hot water into the pan until it comes halfway up the sides of the molds. Do not splash water into the custard.
Stir batter once and fill individual moulds three-quarters full; for a ring mould, pour in all batter and smooth. Set in a roasting pan and add hot water at about 90–95 °C halfway up the moulds, avoiding splashes into the custard.
Bake gently40–55 min
40 to 50 minutes for muffin-size molds — start checking at 38. A larger quindão wants 50 to 65.
Done looks like: a set, glossy surface, deep golden to amber, with a slight jiggle in the very centre when you nudge the pan. Set jelly, not a liquid wave. On a thermometer, a centre of 80–84 °C / 176–183 °F. Much hotter and you are heading for rubber.
Why the bath: direct oven heat cooks the edges far faster than the centre and curdles yolks into a grainy scramble. The water buffers the swings so the top can gloss instead of crusting into a dry skin that cracks.
Browning too fast before the centres set: drop to 165 °C / 330 °F after the first 25 minutes and extend the time. Still pale and wet at 55 minutes: the oven is running cool or the molds were overfilled — give it more time rather than cranking the heat.
Bake individual moulds 40–50 minutes, checking at 38; allow 50–65 for a large ring. Look for glossy golden tops, slight central jiggle and 80–84 °C / 176–183 °F centres. If browning too quickly, lower to 165 °C / 330 °F after 25 minutes; extend baking for wet centres rather than raising heat.
Cool, then chill properly20–30 min, then 3 hours
Lift the tin out of the water bath carefully and cool on a rack 20 to 30 minutes, until the molds are handleable.
Then refrigerate at least 3 hours, overnight if you can. Leave them uncovered for the first 30 minutes if your fridge is humid, so condensation does not bead on the gloss, then cover loosely.
Cold quindim releases cleanly. Warm unmolding tears the shiny face.
Carefully lift moulds from the bath and rack-cool 20–30 minutes until handleable. Refrigerate at least 3 hours, preferably overnight. In a humid fridge, leave uncovered for the first 30 minutes, then cover loosely; unmould only when cold.
Unmold in one motion5 min
Run a thin knife around each edge. Invert a plate over the mold, flip in one confident motion, and tap.
Stuck: warm the mold base with a hot wet towel for 5 to 8 seconds — no longer, or you melt the surface.
The presented face should be shiny, deeply yellow-gold, and slightly sticky to the eye, with coconut speckled through the body when you cut it.
Run a thin knife around each edge, cover with a plate, invert confidently and tap. If stuck, warm the mould base with a hot wet towel for 5–8 seconds only, then release.
Checkpoints
The syrup
Pale, glossy, purely sweet-smelling, 104–106 °C. Any colour at all means you have gone too far.
After tempering
Intense yellow-orange, slightly thickened, no scrambled specks.
The rested batter
Loose cake batter, grainy between the fingers, coconut suspended rather than floating.
Out of the oven
Set and glazed, golden to amber, a slight centre jiggle. 80–84 °C if you check.
The unmolded face
Catching the kitchen light like polished stone. Moist, dense, clearly custard — not cake, not candy, not flan.
Storing it
Keeping them
Airtight in the fridge up to 4 days, with parchment between layers if you stack them. Freezing works up to 1 month, well wrapped, thawed overnight in the fridge. The texture softens slightly and the gloss is less perfect — still good, not pristine. Do not leave them at warm room temperature for long. Yolk-rich custards want the cold.
Serving temperature
Chilled is cleanest for unmolding and for a clean cut. Fifteen minutes out of the fridge softens the bite and lifts the aroma. Hot quindim is not the goal.
Troubleshooting
- Grainy or scrambled texture.
Oven too hot, no water bath, or syrup poured in boiling. Sieve, bath, and temper next time. This batch may still taste fine chopped into a coconut trifle, but the lacquered look is gone.
- The top is dull rather than shiny.
Underbaked, the sugar dusting was skipped, or condensation settled on the surface in the fridge. Bake until the top genuinely looks glazed, cool thoughtfully, and never let plastic wrap touch the face.
- It sticks in the mold.
Not enough butter and sugar, or you unmolded it warm. Grease more aggressively, chill longer, and use the brief warm-towel trick.
- Liquid weeping in the container after chilling.
A slight overbake or an unstable emulsion — and a little syruping on day two is normal. Drain gently before serving. Very wet fresh coconut without adjusting the liquid also causes this, which is why this recipe uses desiccated.
- Too sweet, and flat with it.
The pinch of salt was missing, or the vanilla was omitted and the sugar now dominates. A touch more salt next batter, and serve it with unsweetened coffee or tart fruit rather than reaching for more sugar tricks.
- The coconut floated into a dry layer on top.
The batter was not rested, or the coconut is too coarse. Rest 15 minutes, use finer desiccated, and stir once before filling.
- A rubbery, sponge-like bounce.
Overbaked, or too much white got into the yolks. Pull at the jiggle stage and separate more carefully.
- It collapsed after unmolding.
A severely underbaked centre. Unmolded pieces are hard to rescue — bake fully next time using both the jiggle and the temperature cues.
Substitutions
The spine I keep
Abundant yolks, sugar, coconut, baked in molds, shiny unmolded top, rich and dense rather than milky-soft. Desiccated coconut is standard in many modern home and bakery versions because the moisture is predictable.
Departures in this write-up
A small quantity of water cooked into a light syrup for smoother dissolution, where many recipes beat the sugar straight into the yolks. Optional vanilla. An explicit water bath, where some cooks bake dry and succeed with a well-behaved oven. Muffin tins as the default home mold. A target internal temperature for the doneness-minded. I also insist on sieving, which not every family recipe says out loud.
Not this dish
Pudim de leite, with milk and a poured caramel base doing the structural work. Brigadeiro or beijinho candy logic. A sponge cake with coconut frosting. You can butter-and-sugar the molds as here for a light skin, but pouring a hard caramel layer is pudim's move. Quindim's signature is the yolk-coconut gloss, not a caramel cup.
Scaling
Mold depth drives the bake time far more than batch size does. Deeper vessels need longer, shallower ones less.
Smaller molds, bigger molds
Mini molds for a party tray: start checking at 28 to 30 minutes. Ramekins, being deeper, want longer. One large ring mold for a quindão: 50 to 65 minutes. In every case, judge by the glazed surface and the centre jiggle rather than the clock.
Halving
Ten yolks and half of everything else works, but weigh the yolks rather than counting — at this ratio a 20 g error is visible in the set.
What to serve it with
Chilled, or fifteen minutes out of the fridge.
- A small cup of black coffee — the bitterness cuts the sugar
- Tart fruit alongside, if you want contrast
- A festa tray beside brigadeiro and coxinha
Freeze the leftover whites in labelled portions. Meringue, a clear consommé, or an angel-food cake another day — do not bin them out of guilt.
Questions
Can I use whole eggs?
Not for classic quindim. The whites change both the gel and the colour. Make a different dessert if you need to use them up in the same bake.
Desiccated or sweetened flake coconut?
Unsweetened desiccated. Sweetened flakes add sugar and often an odd dryness. If that is all you have, cut the recipe's sugar by 30–40 g and chop the flakes finer.
Is the water bath mandatory?
Strictly, no — skilled bakers skip it in a well-calibrated oven at a lower temperature. For reliability and far fewer grainy batches, keep it. That is the method taught here.
Can I make the batter ahead?
Yes. Refrigerate covered up to 12 hours, stir well, fill the molds cold, and add 5 to 8 minutes to the bake. The coconut hydrates further and the texture stays good.
What about pasteurized liquid yolks from a carton?
Use them by weight, 360–380 g. The flavour is slightly flatter, and a drop of vanilla helps. Avoid products with added thickeners if you can.
No muffin tin?
Ramekins work — adjust the time, since deeper vessels need longer. Judge by the surface and the jiggle rather than the clock.